Hydrangeas - Planting and Care Guide

Knowledgeable Care and Pruning is the key to achieving a healthy, lush, beautifully flowering Hydrangea plant with lovely form.
Proper Pruning of your Hydrangea
Hydrangea macrophylla, Hydrangea serrata and Hydrangea quercifolia (the mophead, lacecap, and oak-leaf varieties) need pruning to remove dead wood and thin spindly shoots. Late summer is the most popular time to prune this type since it only flowers on growth from the previous season year (known as "old wood"). Prune soon after the flowers have faded and do not cut them back hard, as most of the flowers come from terminal buds at the top of each stem. Cut these off and all your summer flowers go with them. Old dry flower heads can be cut back to the first pair of plump green buds, usually in March or April. To create a fuller plant, remove some of the weaker old and new shoots at the base. By keeping several stems of old productive wood and stout new stems, the shrub will retain a good shape and bloom for next season.
Hydrangea paniculata and Hydrangea arborescens can be cut back hard in spring as these types will produce large blooms on the current season’s growth ("new wood"). After it is established about three years, Hydrangea arborescens can be pruned within 6" of the soil line each spring and will rejuvenate vigorously. If many smaller flowers are preferred, then just a light trim in spring is all that is required, and a more natural effect can be created. If a mass of blooms that encompasses the shrub is desired, prune stems at various heights and remove some to the ground. Because they come into growth later, these species are also very suitable for colder gardens and their cream or greenish-white flowers make wonderful summer displays.
Hydrangeas don’t need to be pruned every year. The major reasons for pruning a hydrangea should be to remove dead wood and/or to open up its interior to keep it healthy. After about 4 – 6 years, it is often useful to cut out one-quarter to one-third of the branches down to the ground to improve the plant’s vigour.
Hydrangea Care
No matter their nativity, Hydrangeas in general are woodland under story plants and thrive in moist but well-drained soils amended with organic matter (humus, leaf mould, compost). Most species tolerate a range of pH conditions.
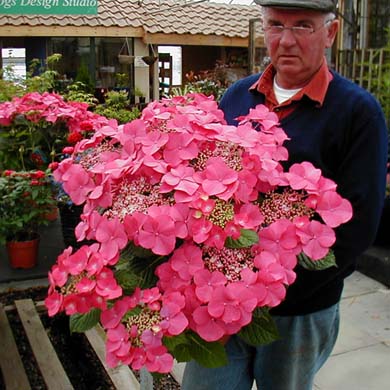
However, the Hydrangea macrophylla and Hydrangea serrata cultivars are unique for their flower colour being determined by the relative acidity of the soil: a pH below 6 (acidic) will usually produce flower colour closer to true blue, whereas a pH above 6 (more alkaline) will produce flowers more pink. Add aluminium sulphate to soil to make flowers bluer or add lime to soil to make flowers pinker (apply to plant root zone in late autumn or early spring). If your soil is already extremely acidic (pH 5.5 or lower) or extremely alkaline (pH 7 or above), it might be very difficult or impossible to change pH sufficiently to change the flower colour of your hydrangea.
Although partially shaded conditions are ideal for most hydrangeas, sunnier sites encourage flower production - as long as consistent soil moisture is maintained Hydrangea paniculata thrives in full sun and tolerates drier soils more than other hydrangeas.
When rainfall is scarce (or less than one inch per week), water weekly for the first year after planting. Watering will necessarily be more critical the first few weeks after planting, especially if dry, sunny, and hot weather follows. Even older, established Hydrangeas wilt in these conditions and are prone to leaf burn and reduced floral display during or after drought periods. A one to two inch layer of coarse mulch over the root zone will help maintain soil moisture.
Planting your Hydrangea
Keep rootball moist (but not soaking wet) until planting. If you are unable to plant soon, keep the plant outdoors in a sheltered, shaded location away from direct sun and wind.
At planting
1. Dig a hole only as deep as the rootball, but at least as wide as twice the diameter of the rootball (the wider the hole, the better!).
2. Add humus (compost, peat moss, etc.) to the soil removed from the planting hole before backfilling.
3. Loosen the roots of your hydrangea don't be afraid to cut the outer roots to break them free before backfilling, so that the roots have good contact with the soil.
4. Make sure to keep the plant high enough when backfilling so that the finished soil surface is even with the top of the original rootball. Remember: digging and planting too deeply is one of the most common factors contributing to the loss of newly planted shrubs.
5.Water in well to soak the soil and encourage soil contact with the roots.

